Google Photos has become an essential tool for storing, managing, and backing up images across devices.
Despite living in a digital-first world, printed photographs still hold a special place when capturing memories in a tangible way.
Those using PCs or Android devices have several easy ways to bring digital photos into physical form, through direct downloads, cloud-based tools, and third-party print services.
Organizing Photos in Google Photos
Proper photo organization plays a major role in preparing images for print. A cluttered photo library can slow down the process and lead to printing mistakes or overlooked favorites.
Start by building albums in Google Photos to group pictures based on themes such as vacations, family gatherings, or celebrations.
Albums act as visual folders, helping users isolate specific memories without endless scrolling.
Albums should be clearly titled and arranged chronologically to enhance navigation and maintain clarity. Adding dates or event names in album titles is helpful, especially when dealing with large libraries.
Creating a structured system helps streamline the process later when it’s time to select images for printing.
To optimize the print selection process, focus on quality and content.
- High resolution for sharp prints
- Clear focus without blur or grain
- Balanced lighting—neither underexposed nor overexposed
- Emotional value or relevance to the event or theme
- Composition suitable for cropping or framing
Albums can also be designed to follow a story, especially if planning a photo book or a themed print collection.
Narrative or chronological order can turn a series of images into a meaningful visual experience. Consider arranging photos to reflect how moments unfolded in real life or highlight specific stages of an event.
Downloading Photos from Google Photos

Accessing digital images stored in Google Photos is an essential step for printing, editing, or sharing.
Both PC and Android users have built-in tools that make it simple to download photos for offline use.
On a PC
Using a computer allows quick access to large batches of images and gives full control over file organization and storage location. Follow these detailed steps to get started:
Visit photos.google.com and sign in with the appropriate Google account. Navigate to your albums or use the search bar to locate specific photos or events.
Hover over a photo and click the checkmark in the top-left corner to select it.
- To select multiple photos:
- Click additional checkmarks for individual selection.
- Use “Shift + Click” to select a continuous batch.
- Click “Select all” if you’re working within a specific album or date range.
- Once selections are made:
- Click the three-dot menu located in the top-right corner.
- Choose “Download.”
- Google Photos will begin creating a ZIP file containing the selected photos.
- ZIP file is saved to the default Downloads folder.
- Extract the ZIP file to access the individual photo files in their original resolution.
Photos are now ready for printing, organizing, or additional editing through any image software.
On an Android Device
Using an Android device offers flexibility and mobility when selecting and saving photos. Downloading to a phone can serve as preparation for transferring images to a PC or printing directly through connected services.
- Tap and hold on a photo to enable selection mode.
- Continue tapping to select multiple images for batch download.
- Use the top-left checkbox if available to select larger groups quickly.
Once the selection is complete:
- Tap the three-dot menu in the upper-right corner.
- Choose “Download.”
- If the images are already stored on the device, this option may not appear.
- Photos not already downloaded will now be saved locally.
Downloaded files are typically found in one of the following folders:
- Downloads
- DCIM > Google Photos
- Internal Storage > Pictures
Using this method is best for managing a small group of photos directly on the mobile device, especially when preparing to print via wireless printers or uploading to online print platforms.
Transferring Photos to PC (If Using Android App)
Managing photos on a larger screen can improve organization and streamline the printing process. Android users have multiple reliable ways to transfer their images to a PC.
These include using a USB cable, the built-in Windows Photos app, Google Photos sync, or cloud-based and wireless tools. Each method has benefits, depending on preferences and available equipment.
Via USB Cable
One of the most direct methods involves connecting the Android phone to the PC using a USB cable.
- Unlock the Android device.
- Swipe down the notification panel.
- Select “File Transfer” or “MTP” mode.
On the PC:
- Open File Explorer.
- Locate the device under “This PC.”
- Navigate to the DCIM folder, then into Camera or Downloads.
Photos can then be transferred using these actions:
- Drag and drop selected images into a folder of choice on the PC.
- Copy and paste if dragging is inconvenient.
- This method guarantees fast transfer without compression, ideal for maintaining high-quality files for print use.
Using Windows Photos App

For users who prefer a built-in solution, Windows Photos app offers a clean interface for photo transfer.
- Open the Photos app on the PC.
- Click “Import” in the top-right corner.
- Select the Android device as the source.
- Choose individual images or import all available ones.
Imported photos will be stored in the Pictures folder by default. They are typically sorted:
- By import date
- By album or event grouping, depending on settings
- This method helps when managing large batches of images, especially after vacations, celebrations, or photoshoots.
Through Google Photos Sync
Using Google Photos backup removes the need for physical cables altogether. Once backup is enabled on the Android device, images automatically become accessible on any browser.
- Visit photos.google.com on the PC.
- Sign in using the same Google account as on the Android device.
- Select desired images.
- Click the three-dot menu, then click “Download.”
Photos are retrieved in original resolution, preserving quality.
- Open the app.
- Tap the profile icon.
- Go to Photos settings > Backup.
Photos and videos sync whenever the device connects to Wi-Fi, ensuring availability without delay.
OneDrive & Phone Link Alternatives
For those who rely on Microsoft services, two alternative options provide excellent integration.
Users can enable automatic photo uploads using OneDrive or wirelessly sync their device with Windows using Phone Link.
- Install the OneDrive app on the Android device.
- Enable photo upload in the app settings.
- Access uploaded images via the OneDrive folder on the PC.
Using Microsoft Phone Link:
- Pair the Android phone with Windows via Bluetooth or Wi-Fi.
- Open Phone Link on the PC.
- Browse, copy, or save recent images directly.
Choosing a Printing Method
Turning digital images into printed keepsakes offers a satisfying way to make memories more permanent.
Several methods are available to fit different needs, whether convenience, creative control, or immediate access is the goal.
Users can opt for online printing services or print at home using basic software and equipment.
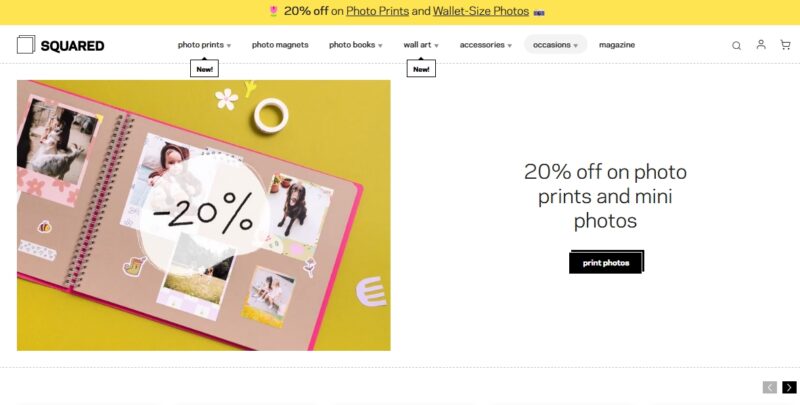
Using Online Printing Services (e.g., Squared.one)
Online services like Squared.one simplify photo printing without requiring a printer or special materials.
Orders are placed entirely online, with a variety of customizable products to choose from.
Start by navigating to Squared.one. Upon arriving at the homepage, browse through available print products.
- Square prints for minimalistic aesthetics
- Photo magnets to personalize refrigerators or office spaces
- Custom photo books or albums for themed memories
- Framed prints and wall decor for gifting or display
After selecting a product, begin the upload process. Images can be selected directly from a local device or synced through mobile services for easier access. Most services provide editing tools to enhance or personalize photos before printing.
- Crop images to match product dimensions
- Add captions or short messages for context
- Apply filters to adjust tone or mood
- Choose layout and frame options for a polished finish
Once all adjustments are complete, proceed to checkout. Enter a delivery address, select shipping preferences, and confirm payment.
Orders are usually delivered within a few business days, depending on location and shipping method. No technical skills are required, and the results are professionally printed and packaged.
Local or At-Home Printing
Those preferring direct control may choose to print photos at home. Open the photo file in a default viewer such as Windows Photo Viewer or a third-party app.
Begin printing by clicking the printer icon or pressing Ctrl + P. A print dialog box appears, offering customization options.
- Printer device from the available options
- Paper size such as 4×6, 5×7, or A4 depending on project
- Orientation: portrait or landscape
- Print quality settings (draft, normal, best)
- Color settings: full color, grayscale, or black and white
- Border style: bordered or borderless print layout
For best output, use:
- Glossy photo paper or specialized matte paper
- High-resolution images to avoid pixelation
- Color ink cartridges that are full or recently replaced
- Clean printer nozzles and test prints to ensure clarity
In-home printing works best for immediate needs, smaller batches, or experimenting with layouts before committing to a larger order.
The Bottom Line
Digital images deserve more than just screen time. Printing them adds sentimental value and helps preserve memories for generations.
Between cloud sync options, cable transfers, and multiple print methods, turning digital photos into real-world keepsakes is simple and rewarding for anyone using a PC or Android device.